Are you looking to unleash your creativity and create custom-made products without breaking the bank? Look no further! In this ultimate guide to DIY vacuum forming, we'll show you how to bring your ideas to life on a budget. Whether you're a hobbyist, artist, or entrepreneur, vacuum forming gives you the power to mold plastic into any shape you desire. With easy-to-follow steps and cost-effective materials, we'll teach you everything you need to know about vacuum forming. From building your own vacuum forming machine to creating molds and heating the plastic, we'll demystify the process and equip you with the skills to produce high-quality, professional-looking creations. Get ready to witness your imagination take tangible form as we delve into the world of DIY vacuum forming. Discover the endless possibilities of turning simple sheets of plastic into functional prototypes, customized accessories, and eye-catching art pieces. Get ready to revolutionize your DIY projects and bring your ideas to life with DIY vacuum forming! So, gather your materials and let's get started on this exciting journey of creating custom-made products on a budget.
Benefits of DIY Vacuum Forming
DIY vacuum forming, often regarded as a hidden gem in the world of manufacturing and design, brings a plethora of tangible benefits that can significantly impact your business or creative projects. Here are some key advantages:
1. Cost Efficiency: DIY vacuum forming is a cost-effective solution for small and medium-sized enterprises (SMEs), startups, and makers. It eliminates the high tooling costs associated with traditional manufacturing methods like injection molding. This means you can produce custom parts or prototypes without breaking the bank.
2. Rapid Prototyping: For product designers and engineers, DIY vacuum forming is a game-changer. It enables you to quickly iterate and test your designs without lengthy lead times. Prototyping with vacuum forming is a smart move if you want to refine your product concepts or showcase your ideas to potential investors.
3. Versatility: The process is incredibly versatile. It can be used for anything from crafting custom packaging and automotive components to cosplay armor and displays. With DIY vacuum forming, you're limited only by your imagination.
4. Short Production Runs: Unlike mass production methods, vacuum forming is ideal for short to medium production runs. If your business thrives on the concept of limited-edition items or personalized products, DIY vacuum forming is your ideal manufacturing solution.
5. Reduced Waste: Vacuum forming generates minimal waste since it uses only the plastic required for the product. Plus, most of the waste produced during vacuum forming can be recycled, contributing to eco-friendly manufacturing.
.jpg)
Vacuum Forming Process and Equipment
To make the most of DIY vacuum forming, it's crucial to familiarize yourself with the process and the necessary equipment. Let's delve deeper into each component:
1. The Heating Source: DIY vacuum forming typically uses infrared heaters or ovens to heat thermoplastic sheets. This technology ensures consistent heating and pliability, making it easier to achieve precise results.
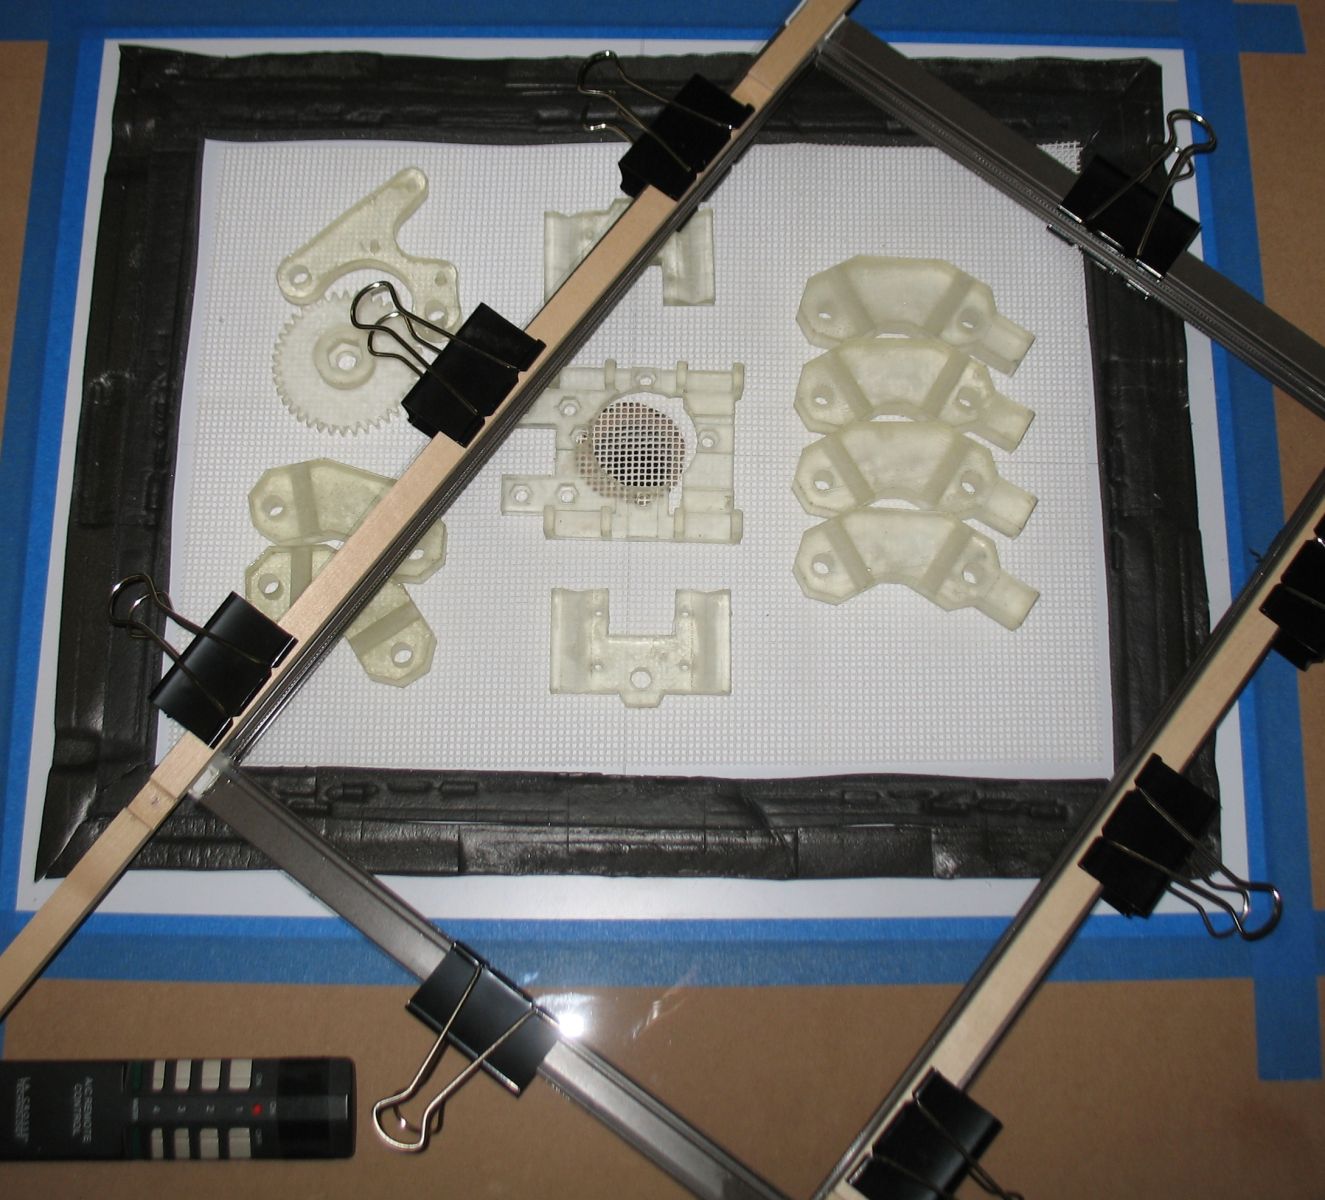
2. The Vacuum Table or Frame: DIY vacuum forming frames are often made from aluminum or steel for durability. Investing in a robust frame will ensure stability during the forming process, resulting in higher-quality products.
3. The Mold: Molds can be made from a variety of materials, but for longevity, aluminum or CNC-machined molds are recommended. These materials maintain dimensional accuracy and can withstand numerous cycles.
4. The Vacuum Pump: High-quality vacuum pumps ensure strong suction, allowing you to pull the heated plastic sheets tightly over the molds. Investing in a dependable vacuum pump is essential for consistent and high-quality forming.
Choosing the Right Materials for Vacuum Forming
Selecting the appropriate material is where the magic of DIY vacuum forming happens. You can achieve remarkable results by choosing the right thermoplastic for your project. Delve into the specifics of each material:
1. ABS (Acrylonitrile Butadiene Styrene): Known for its durability and impact resistance, ABS is a popular choice for items like cases, enclosures, and automotive components. Its versatility and ability to hold intricate details make it a preferred material for various applications.
2. PETG (Polyethylene Terephthalate Glycol): PETG offers excellent transparency and is frequently used for display items, signage, and packaging. Its optical clarity and ease of processing make it a top choice for creating eye-catching products.
3. Polystyrene (PS): Polystyrene is a lightweight and cost-effective option, perfect for products like blister packaging, disposable containers, and signs. Its ease of handling and adaptability suit a wide range of applications.
By mastering the characteristics and applications of these materials, you can make informed decisions that lead to superior end products.
Designing Your Custom-Made Products for Vacuum Forming
The true beauty of vacuum forming lies in its capacity to transform your creative concepts into tangible reality. Dive deeper into the design process:
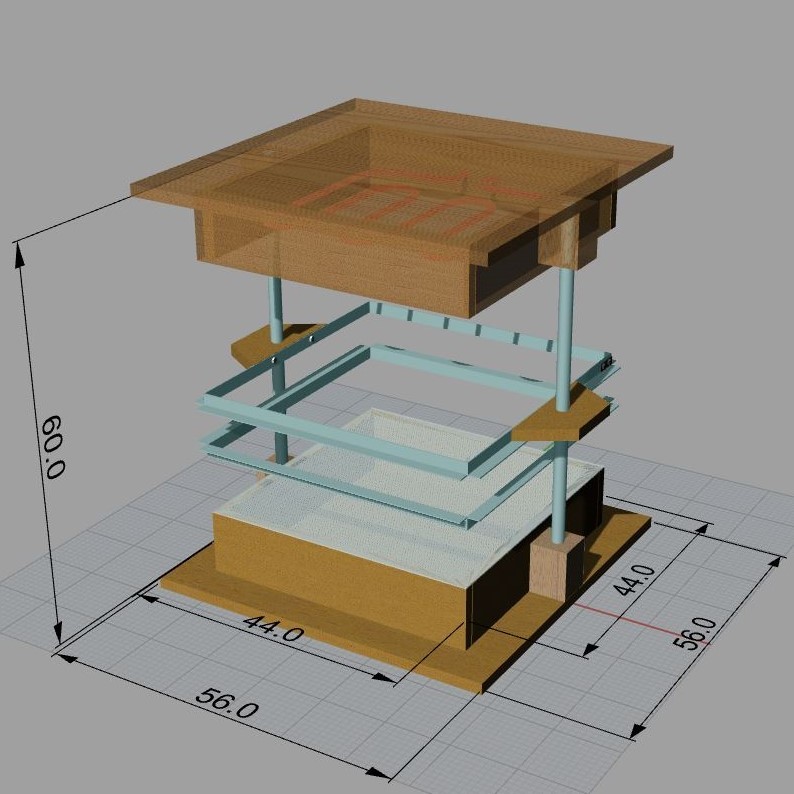
1. CAD Software: Consider using Computer-Aided Design (CAD) software to create precise and detailed 3D models of your products. CAD allows you to visualize your designs from all angles and adjust them with ease.
2. Design Considerations: Remember that vacuum forming is best suited for products with shallow to moderately deep parts and simple to moderately complex geometries. Ensure your design is draft-friendly and accounts for parting lines to facilitate smooth production.
3. Incorporating Textures and Logos: Vacuum forming enables the incorporation of textures and logos directly into the design, further enhancing the aesthetic appeal of your products.
Promote the idea that with the right design, DIY vacuum forming can bring any idea to life, whether it's a unique packaging solution for a niche market or a visually stunning display for your business.
Preparing the Mold for Vacuum Forming
Highlight the significance of mold preparation in achieving consistently high-quality vacuum-formed products:
1. Material Selection: Emphasize that the choice of mold material can impact product quality and mold longevity. Aluminum and CNC-machined molds are excellent options for precision and durability.
2. Mold Surface Finish: Smooth and polished molds are crucial for optimal results. Elaborate on the importance of sanding, polishing, and ensuring uniform texture across the mold surface.
3. Release Agents: Discuss the use of mold release agents and their role in preventing sticking and enhancing the release of formed parts, ultimately prolonging the life of the mold.
By stressing the importance of mold preparation, you help readers understand how attention to detail in this step can lead to a successful vacuum forming process.
Vacuum Forming Techniques and Tips
To help readers excel in vacuum forming, provide them with advanced techniques and tips:
1. Temperature Control: Explain that precise temperature control is crucial. Share insights on temperature profiles for different materials and product types. Discuss the benefits of infrared heaters for consistent heating.
2. Sheet Tension and Uniformity: Discuss the significance of even sheet tension to prevent thin or weak areas in the final product. Explain how to achieve this through frame design and adjustments.
3. Vacuum Pressure Adjustments: Share advanced tips on fine-tuning vacuum pressure to achieve the desired level of detail and definition in the formed parts. Encourage experimentation and provide guidelines for different applications.
4. Cooling and Trimming Techniques: Delve into cooling techniques and their impact on part quality. Discuss the best practices for trimming excess material, ensuring clean, professional finishes.
By offering advanced insights and tips, you position yourself as an expert and provide valuable guidance for readers looking to take their vacuum forming skills to the next level.
Finishing and Post-Processing Your Vacuum-Formed Products
This is where your products truly shine. Elevate the post-processing stage:
1. Cutting and Trimming: Discuss advanced techniques for precise cutting and trimming, including tools and methods for creating intricate details.
2. Adding Components: Explore the possibilities of adding components to your vacuum-formed products, such as hinges, fasteners, or inserts.
3. Surface Finishing: Detail advanced methods for enhancing the visual appeal of your products, including painting, vinyl wrapping, and the application of decals or graphics. Highlight the significance of surface finish in branding and aesthetics.
By providing readers with a range of advanced finishing techniques, you empower them to create products that stand out in the market.
Budget-Friendly Options for DIY Vacuum Forming
Promote the idea that DIY vacuum forming can be both cost-effective and high-quality:
1. Reuse Molds:* Encourage readers to explore mold reuse for similar products, emphasizing that a well-maintained mold can be a valuable asset in saving costs.
2. Bulk Material Purchases:* Highlight the potential for significant cost savings when buying thermoplastic materials in larger quantities. Provide insights on material storage and handling to maximize these savings.
3. Second-Hand Equipment:* Discuss the availability of used vacuum forming equipment, promoting the idea that affordable, pre-owned machinery can provide an excellent entry point into vacuum forming.
4. DIY Mold Making:* Offer readers guidance on crafting their own molds, which can be a cost-effective alternative to purchasing pre-made molds.
Conclusion and Next Steps
Wrap up the article by reiterating the key takeaways and encouraging readers to explore the endless possibilities of DIY vacuum forming:
1. Reiterate the benefits of DIY vacuum forming: Remind readers of the cost efficiency, rapid prototyping capabilities, versatility, and reduced waste associated with this manufacturing method.
2. Encourage Continued Learning: Suggest that readers continue to learn and refine their vacuum forming skills, offering resources such as books, online courses, and forums to support their journey.
3. Share Success Stories: Include success stories or case studies to inspire readers and showcase the real-world applications of DIY vacuum forming.
4. Promote Your Business: Consider adding a call to action for readers to explore your DIY vacuum forming services or products. Offer discounts, access to exclusive resources, or the opportunity to consult with your experts.
By further deepening the content and highlighting the advantages of DIY vacuum forming, you position your business as a knowledgeable and supportive resource for both beginners and experienced enthusiasts.
.jpg)
1. Can DIY Vacuum Forming Handle Complex Shapes and Intricate Details?
Answer: Absolutely. While vacuum forming is best suited for shallow to moderately deep parts, it can still handle complex shapes and intricate details with precision. By following the right design principles and techniques, you can achieve remarkable results.
2. What Are the Key Considerations When Choosing the Right Vacuum Forming Material?
Answer: The choice of material is pivotal to the success of your vacuum-formed product. Consider factors such as the intended use, durability, transparency, and flexibility. ABS, PETG, and polystyrene are popular choices, each with unique properties suitable for different applications.
3. How Do I Ensure Consistent Results in Vacuum Forming?
Answer: Achieving consistent results in vacuum forming requires close attention to several factors. These include precise temperature control, maintaining even sheet tension, adjusting vacuum pressure, and using proper cooling and trimming techniques. Mastery of these techniques leads to consistent, high-quality outcomes.
4. Are There Eco-Friendly Aspects to DIY Vacuum Forming?
Answer: Yes, DIY vacuum forming can be eco-friendly. It generates minimal waste as it uses only the plastic required for the product, and most of the waste produced during vacuum forming can be recycled. This reduces environmental impact and promotes sustainability in manufacturing.
5. How Can I Get Started with DIY Vacuum Forming on a Budget?
Answer: Starting with DIY vacuum forming on a budget is entirely possible. Reusing molds, buying materials in bulk, and exploring second-hand equipment are just a few cost-effective strategies. Additionally, consider making your own molds as a budget-friendly alternative.